

本文主要介绍TX2模组及载板的上电自启动。TX2系列模组不同的版本,对上电自启动的支持也不一样,大家在实际应用中一定要搞清楚所使用的模组及载板的版本,模组包括TX2、TX2 4GB、TX2i等版本,以及早期的TX1;官方载板主流的至少包括B02、B04、C02等版本。
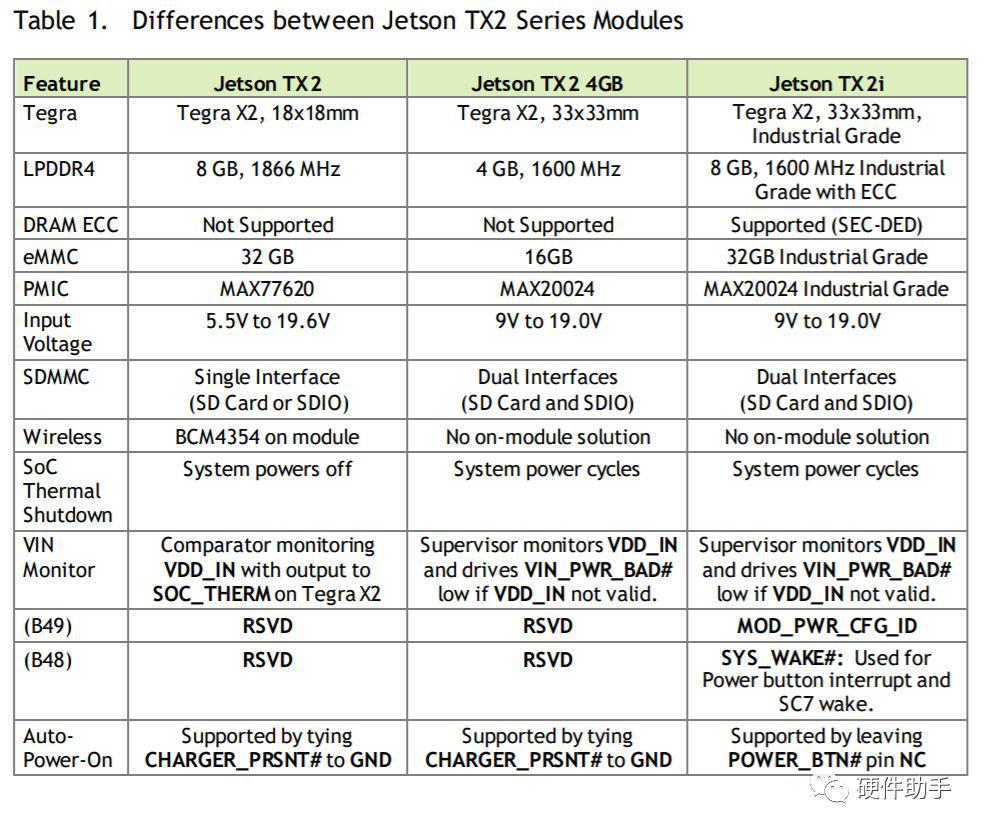
Jetson TX2模组支持自动开机。允许载板在VDD_IN上电时自动上电而不需要等待电源按钮按下。为了使能该功能,CHARGER_PRSNT#引脚需要接GND。
Microcontroller: Recommended if a microcontroller is already being used to control power-on.
Supervisor IC: Using a supervisor IC and related discrete devices to meet the sequencing requirements.
Discrete Circuit: Circuit using only discrete devices to meet the sequencing requirements.
第一种方式是通过外部MCU实现的,实现方式如下:
After the microcontroller is out of reset wait 300ms before driving CHARGER_PRSNT# low or pulsing POWER_BTN# low
If the POWER_BTN# pin is used, it should be held low for a time period between 50ms & 5sec.
If the CHARGER_PRSNT# pin is used, it should be held low for >200us
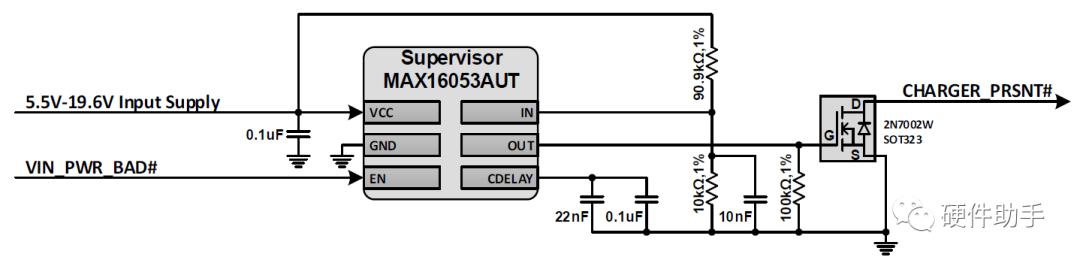
第二种是通过电压监控芯片的方式实现,具体方式如下:
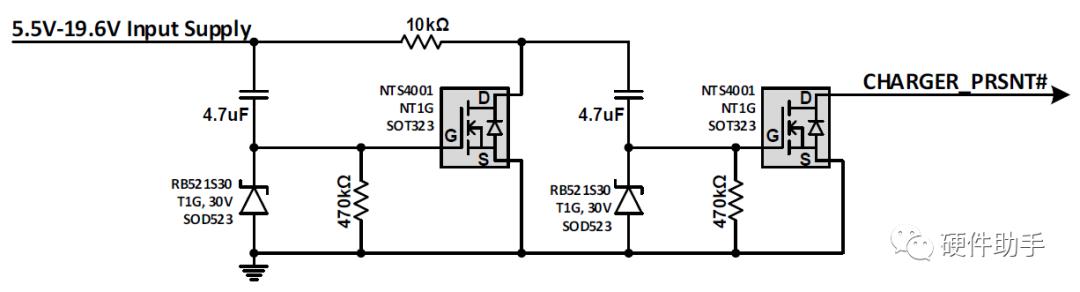
第三种是通过分立器件实现,具体方式如下:
对于Jetson TX2/TX2 4GB,为了使能该功能,CHARGER_PRSNT#引脚需要接GND。时序和第一版描述的一致。
对于Jetson TX2i,它使用了不同的PMIC(并且没有TX2 4GB上的电路以使其与TX2兼容),POWER_BTN#引脚需要拉高。TX2i的PMIC内部有一个对电平敏感的输入信号,因此当VDD_IN有效后,需要拉高POWER_BTN#引脚,但由于该引脚在模组上已经上拉了,因此上电自启时只需将该引脚悬空即可。
Red LED (CR5) added to indicate main power source is active/connected.
Red LED (CR6) added to indicate 12V supply to PCIe & SATA connectors is active.
Various minor circuit changes to improve power-on reliability.
Added Power-on mechanism selection strapping pin – MOD_PWR_CFG_ID at RSVD module pin B49. Jetson TX2 and Jetson TX2 4GB/TX2i have different Power Management ICs (PMICs) which have different power-on requirements. Jetson TX2 4GB has logic to make it compatible with Jetson TX2. The MOD_PWR_CFG_ID pin is pulled high on the carrier board and strapped either low (TX2i) or left unconnected (TX2/TX2 4GB)
Added SYS_WAKE# signal at RSVD module pin 848. This is only supported on Jetson TX2i.
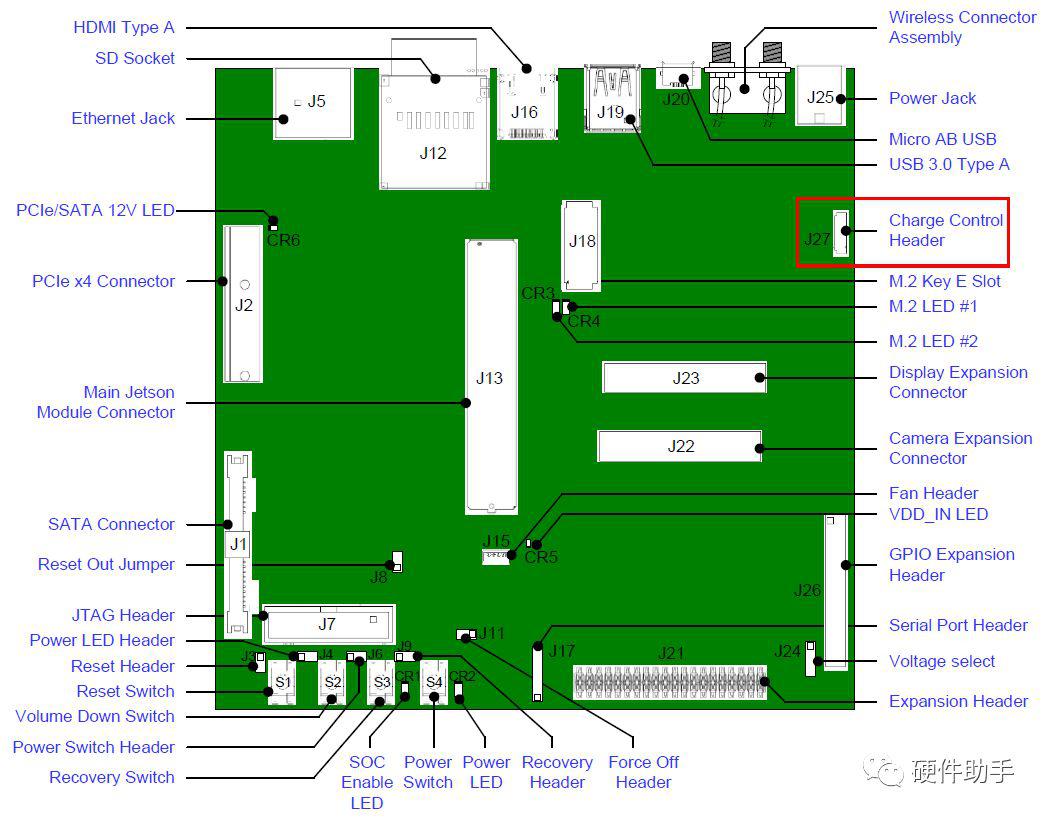
2-pin headers for Reset (J3), Power (J6), Force Recovery (J9) and Force Power Off (J9) are replaced with a single 10-pin header (J20).
Power LED header moved near one end of the JTAG header (J7).
SATA connector changed to Right Angle type to avoid possible conflict with PCIe card.
The Auto-Power-On option designed into the Jetson TX2 module will not work with the C02 carrier board due to the power-on type control circuitry. See Appendix: P2597_C02 Auto-Power-On Rework for instructions for modifying P2597_C02 boards to support Auto-Power-On.
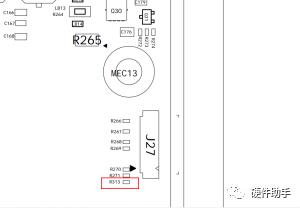
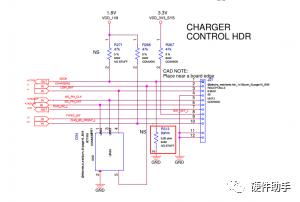
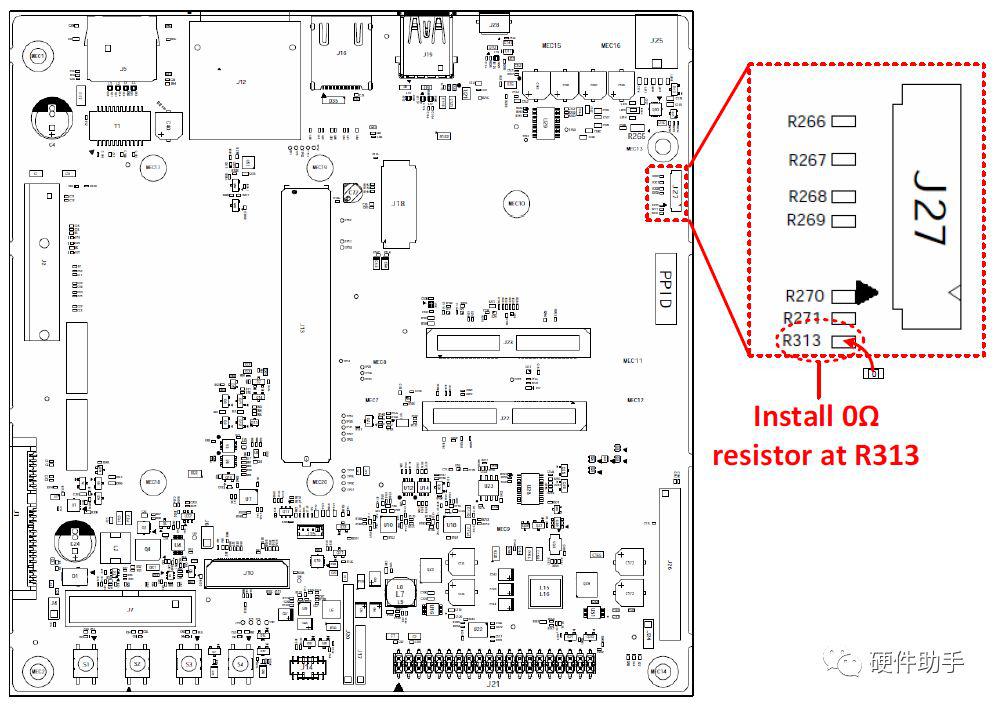
Install 0 Ohm, 0402 resistor at R313. Asserts ACOK to allow Jetson TX2 or Jetson TX2 4GB to Auto-Power-On.
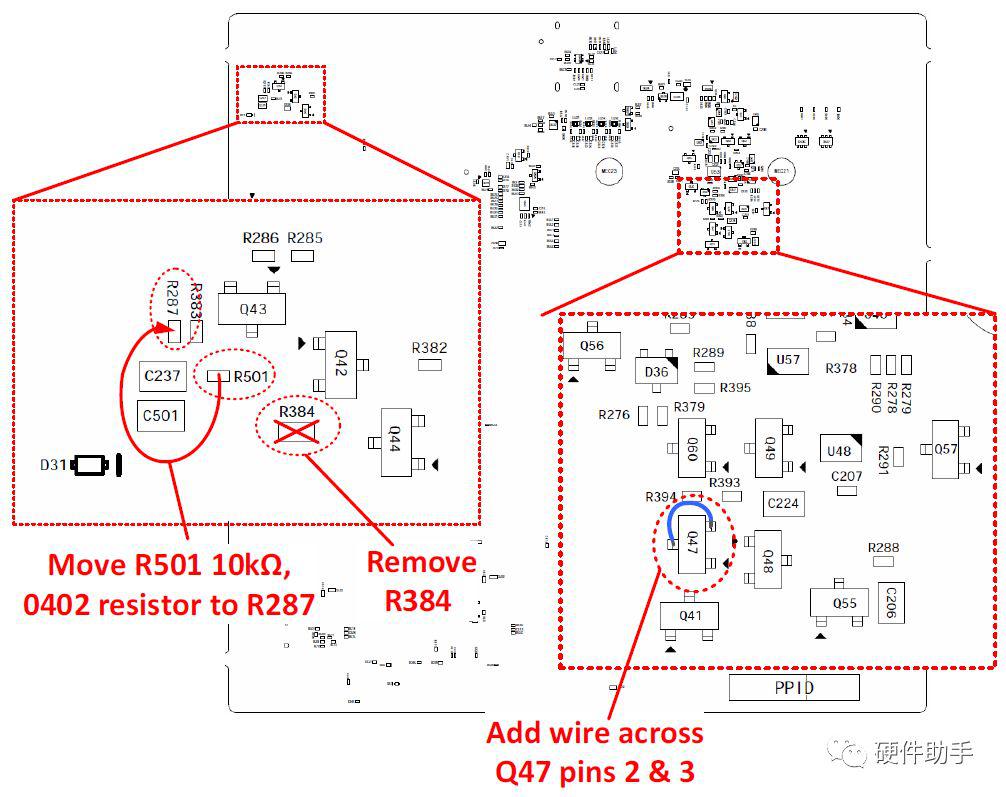
Move R501, 10k, 0402, resistor to R287. Enables the VDD_IN supply to the module connector as soon as the power is applied (disables hot-plug protection)
Remove R383. Disables the ON control from the pushbutton Micro-Controller
Remove R384. Removes the VDD_IN Bleeder resistor to keep this from consuming power during normal operation.
Add wire across Q47 pin 2 and 3. Force Button Micro-Controller in Mobile PMIC Mode (allows Jetson TX2i to function as if it were in a P2597_B04 carrier board – will boot when power is attached without button press)
以上就是针对TX2系列模组及载板的上电自启的实现详解,有需要的可以参考相关文档及官网论坛等。